
Dipping your toes into the world of webcam streaming can feel overwhelming, but getting a professional-looking broadcast up and running is more about smart choices than spending a fortune. A solid webcam streaming setup really boils down to three things: the right gear, the right software, and airtight security. This isn't just about looking good on camera; it’s about creating a stream that's reliable, secure, and lets you build an audience and earn without putting your real life on the line.
Building Your Foundation for a Pro Stream
Let's cut to the chase. You don't need a Hollywood studio in your spare room to get started. What you absolutely need, though, is a practical grasp of the basic components and why each one matters. I've seen countless new models rush out to buy the most expensive camera they can find, only to end up with a grainy, pixelated mess because their software was configured badly or their lighting was an afterthought.
The goal here is to build a setup that just works. It has to be reliable, so your stream doesn’t constantly drop or buffer—the fastest way to lose paying viewers. It must be secure, protecting your real-world identity and your finances from day one. And it needs to be effective, meaning your audio is clear, your video is sharp, and you're presenting a polished image that makes people want to stick around, tip, and come back for more.
The Three Pillars of Streaming Success
I like to think of a good setup as a three-legged stool. If any leg is shaky, the whole thing will topple over.
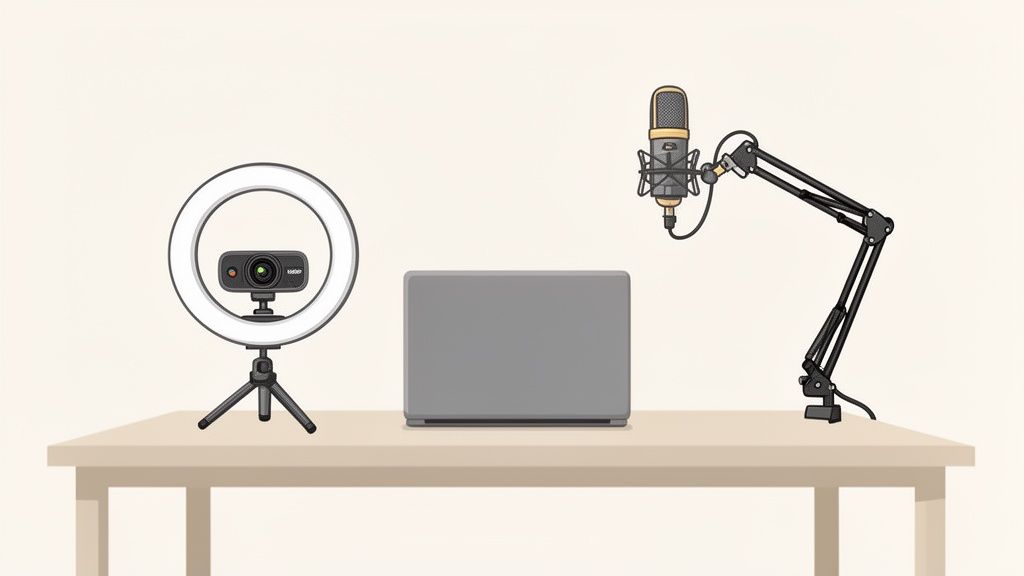
- Smart Gear Choices: This is your camera, microphone, and lighting. "Good quality" doesn't mean breaking the bank, but it does mean picking kit that genuinely improves how you look and sound.
- Configured Software: This is your broadcasting software, usually a free tool like OBS Studio, that acts as your stream's mission control. It pulls everything together and sends it out to the platform.
- Airtight Security: This is all about building a firewall between your public streaming persona and your private life. It's easily the most overlooked part of setting up, but honestly, it's the most critical.
Before we get into the nitty-gritty of specific cameras or mics, it helps to see how these pieces connect. This flowchart breaks down the foundational steps.

Seeing it laid out like this makes it clear that a successful setup is a process. You start with the physical gear, move to the digital configuration, and wrap it all in a layer of personal security. Each step builds on the last.
Getting these fundamentals right is what separates hobbyists from the serious creators who build a career out of this. To get a feel for the environment you're stepping into, it’s a good idea to understand how webcam sites work and connect performers with audiences. It gives you the bigger picture and shows why a professional and secure setup is non-negotiable. In the next few sections, we'll break down each of these pillars into simple, actionable steps.
Choosing Gear That Actually Makes a Difference
Let's get straight to it: your gear is the foundation of your entire stream. We’re talking about the holy trinity—your camera, your microphone, and your lighting. Getting these right isn’t about showing off expensive equipment; it’s about creating a seamless experience so your audience can focus entirely on you. A professional-looking stream is built on smart choices, not just big spending.
So many new streamers fall into the trap of thinking they need a complicated DSLR setup right from the start. Honestly, a high-quality 1080p USB webcam is often the much smarter, more practical choice when you're just getting going. They're built for one purpose—streaming video to your computer—and they do it brilliantly without the hassle of capture cards, dummy batteries, and confusing menus.
Your Camera: The Digital First Impression
Your camera is your audience's window into your world. A grainy, stuttering feed from your laptop’s built-in camera just won't cut it. You need a dedicated webcam that can deliver a crisp, clear picture, ideally at 1080p resolution with at least 30 frames per second (fps). That's the baseline for a quality stream today.
The good news? You don't need to break the bank. There are tons of fantastic 1080p models available, with many solid options for under £50. The boom in home working and content creation means the market is flooded with decent, affordable kit. They plug in, they work, and they let you focus on your performance.
When you're ready to explore specific models, our guide to the best camera for live streaming breaks down the top contenders that really deliver on both quality and value.
Your Mic: The Most Underrated Piece of Kit
Here’s a piece of advice I can't stress enough: people will put up with slightly less-than-perfect video, but they will click away in seconds if the audio is bad. If you sound like you’re broadcasting from inside a tin can at the bottom of a swimming pool, you’ve lost them. Your laptop's built-in mic is, without a doubt, your biggest enemy here.
The single biggest mistake new streamers make is prioritising their camera over their microphone. Clear, rich audio builds intimacy and connection; distorted sound just creates frustration and makes people leave.
Grabbing a separate USB microphone is the single most impactful upgrade you can make for the least amount of money. Models like the Samson Q2U or the Blue Yeti are industry staples for good reason. They plug straight into your computer, capture your voice with genuine warmth and clarity, and slash all that horrible background noise that built-in mics are famous for.
Lighting: The Secret to Looking Your Best
Finally, let's talk about lighting. Great lighting is the magic dust that can make a £60 webcam perform like a £600 camera. It has the power to smooth out skin tones, sharpen your video, and make you pop on screen, setting you apart from a sea of dimly-lit streams.
And no, you don't need some over-the-top, three-point Hollywood lighting setup. Often, just one decent light source can completely transform your stream's quality.
- Key Light: This is your primary light. You'll want to place it in front of you, a little off to one side and angled down slightly. It’s the light that does all the heavy lifting for illuminating your face.
- Ring Light: There’s a reason these are so popular. Ring lights give you soft, even, and incredibly flattering light that minimises harsh shadows. They are dead simple to set up and massively effective.
For a basic yet powerful start, a single ring light or a small LED panel will do the trick perfectly as your key light. It’s a small investment that pays off enormously in how polished and professional your stream looks.
Essential Streaming Gear Comparison
Navigating the world of streaming gear can be overwhelming. To simplify things, here’s a quick breakdown of solid options across different budgets. This table should give you a clear starting point for building a kit that works for you without unnecessary expense.
| Gear Type | Budget Option (Under £75) | Mid-Range Option (£75-£200) | Pro-Level Option (£200+) |
|---|---|---|---|
| Camera | A reliable 1080p/30fps USB webcam (e.g., Logitech C920). | Premium 1080p/60fps webcam or a basic mirrorless camera setup. | High-end mirrorless or DSLR camera with a capture card (e.g., Elgato Cam Link 4K). |
| Microphone | A solid USB mic like the Samson Q2U or a good-quality lavalier mic. | A versatile, high-quality USB mic (e.g., Blue Yeti, Rode NT-USB+). | An XLR microphone setup with an audio interface (e.g., Shure SM7B + Focusrite Scarlett). |
| Lighting | A single 10-12 inch ring light or a small clip-on LED panel. | A larger ring light with adjustable colour temperature, or a key light panel (e.g., Elgato Key Light Air). | A two or three-point lighting setup with high-quality LED panels and softboxes. |
Remember, the goal is to find the sweet spot between quality and cost that fits your needs right now. You can always upgrade individual components down the line as your channel grows. Start smart, and focus on creating a clean, professional base to build upon.
Getting to Grips with Your Broadcasting Software
Right, so you’ve got the gear. Your camera’s looking sharp, your mic sounds crystal clear, and the lighting is spot-on. But all that shiny new kit is just a collection of expensive paperweights without the right software to pull it all together. This is the bit that can feel a little daunting, but trust me, it’s where you truly take control and turn a simple video feed into a proper, professional broadcast.
We’re going to focus on a powerhouse tool that’s completely free: OBS Studio. There's a good reason it's the industry standard—it’s incredibly versatile and gives you total creative freedom. Think of OBS as your digital command centre. It takes your camera feed, your microphone audio, and any other visual bits and pieces you want to add, then bundles them all up into a single, polished stream to send out to your chosen platform.
Dialling In Your Core Settings
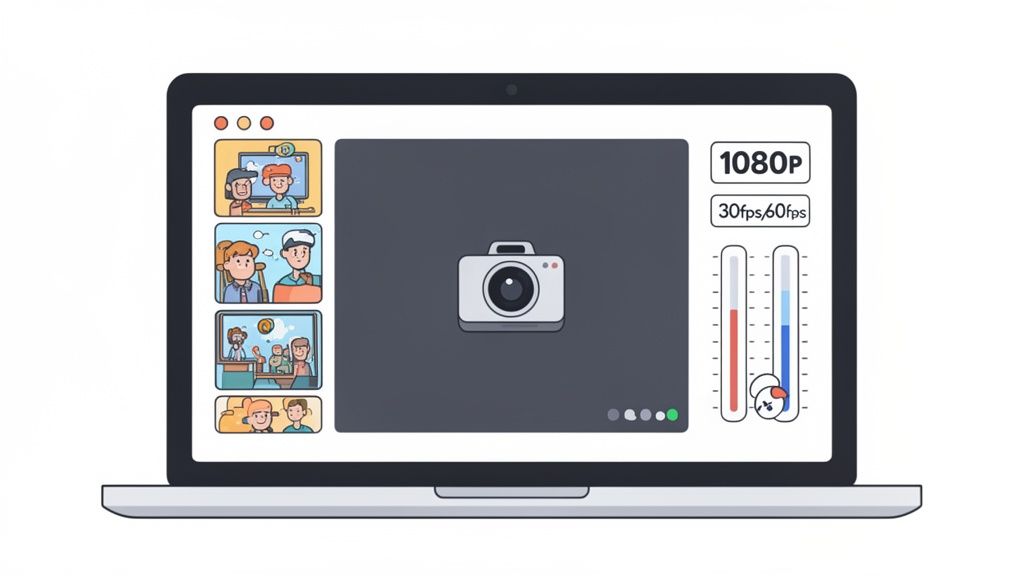
Nailing your settings from the get-go is the difference between a smooth, stable stream and a buffering nightmare that has viewers clicking away in seconds. The big three you need to wrap your head around are resolution, framerate, and bitrate. Don't worry, it's far less complicated than it sounds.
-
Resolution (How sharp it looks): This is all about the clarity of your video. For most platforms, 1080p (1920×1080) is the gold standard. It’s what viewers expect and it looks professional. If your internet connection is a bit wobbly, dropping to 720p (1280×720) is a perfectly smart move. It’s far better to have a crisp 720p stream than a stuttering 1080p one.
-
Framerate (How smooth it looks): This is simply how many images, or frames, are shown per second. For most webcam streaming, 30fps (frames per second) is absolutely fine. It provides that natural, almost cinematic look. While 60fps is noticeably smoother, it demands a much more powerful computer and a beefier internet connection. Stick with 30fps unless you have a very specific reason not to.
Now, let's tackle the big one.
Understanding Bitrate Without the Headache
In simple terms, bitrate is the amount of data you're sending to the streaming platform every second. A higher bitrate equals a higher quality picture, but—and it’s a big but—it requires a faster and more stable internet upload speed. This is the hurdle where so many new streamers stumble.
Even with decent broadband, your upload speed is often a fraction of your download speed. Buffering isn't just annoying; it kills your momentum and your earnings. A viewer who gets frustrated with a stuttering stream isn't going to stick around to tip.
My best piece of advice: Before you touch anything, run an internet speed test and pay close attention to your upload speed. A solid rule of thumb is to set your bitrate in OBS to no more than 75% of your stable upload speed. This gives you a crucial buffer zone, preventing your stream from dropping if your connection decides to fluctuate.
Building Your On-Screen Scenes
Once your core settings are locked in, the fun really begins. In OBS, you don't just have one static layout; you build different Scenes. Think of a scene as a complete layout of sources—your camera, microphone, text, images, or on-screen alerts—all arranged exactly how you want them.
You can get really creative here. For instance:
- Main Cam Scene: Just your main camera feed, filling the whole screen.
- BRB Scene: A stylish "Be Right Back" graphic, maybe with some chilled-out music playing in the background.
- Goals Scene: Your camera feed in a smaller window, positioned next to a graphic showing your token or tip goals for the stream.
To each scene, you add different Sources. The essentials to start with are your camera (as a Video Capture Device) and your microphone (as an Audio Input Capture). From there, you can add images, text overlays with your username, or even browser sources for real-time tip alerts.
Learning to switch between these scenes smoothly is what elevates your broadcast from amateur to pro. For those wanting that one-touch control without forking out for pricey hardware, checking out a Stream Deck alternative is a brilliant, budget-friendly option. Mastering this software is really the technical heart of any successful webcam streaming setup guide.
Fortifying Your Privacy and Security
Let’s be brutally honest for a moment. The second you hit that ‘Go Live’ button, you’re not just a person in a room anymore; you're a public figure. Your privacy stops being a given and becomes something you have to actively build and defend. This section isn’t a list of polite suggestions—it's your essential security playbook. Ignoring this is the single biggest mistake you can make, and it's one that’s incredibly hard to undo once your personal information is out in the wild.
Think of it as building a digital fortress. Your streaming persona lives safely inside the walls, while your real life stays completely separate on the outside. This separation is non-negotiable. The very first brick in that wall is creating a brand-new identity from the ground up. This goes way beyond just picking a catchy username; it’s about constructing an entire digital ecosystem just for your creator life.
Constructing Your Digital Persona
First things first: your streaming name needs to have absolutely zero connection to your real name, old usernames, or anything someone could use to trace back to you. From there, you build outwards.
- Dedicated Email Address: Get a new email address that uses your new persona. This is what you'll use for platform sign-ups, social media, and any business enquiries. Never, ever link it to your personal email account.
- Separate Social Media: Any social media you create to promote your stream must be for your streaming identity only. A rookie mistake is following your real-life friends or family from these accounts—it creates a digital breadcrumb trail right back to your front door.
- Careful Backstory: Decide on a backstory for your persona that is distinct from your real life. Avoid sharing specific details like your hometown, which university you went to, or where you used to work.
These steps create crucial layers of separation. They make it significantly harder for a casual viewer—or someone with malicious intent—to connect your online world with your offline identity.
Your Digital Cloak of Invisibility
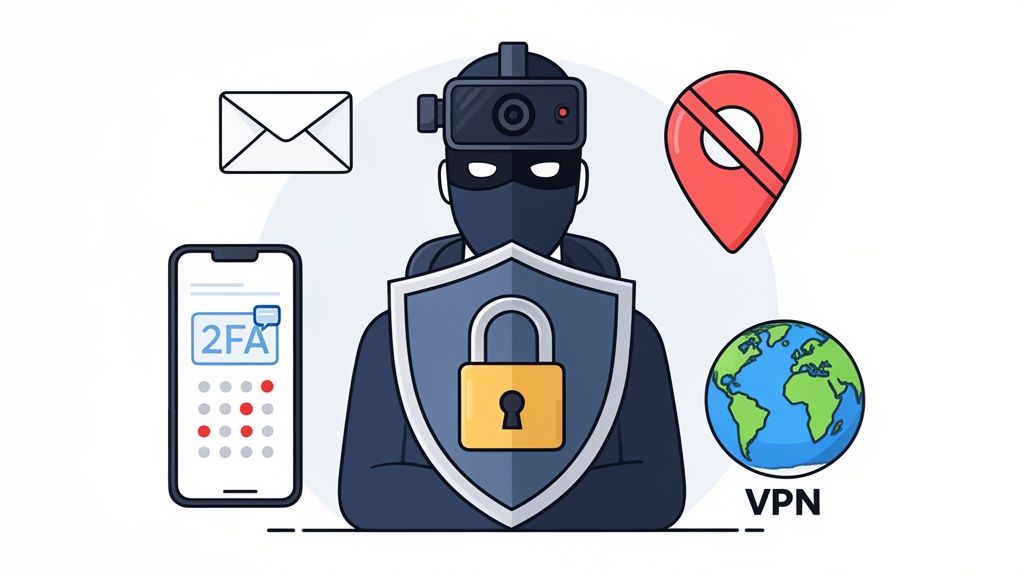
With your persona established, it's time to lock down your technical footprint. Your IP address is basically a digital postcode for your internet connection, and leaving it exposed is a massive security risk. This is where a Virtual Private Network (VPN) becomes an essential tool in your webcam streaming setup guide.
A VPN works by routing your internet traffic through a secure, encrypted server somewhere else in the world. To any website you connect to, it looks like you’re located wherever that server is, effectively masking your real location. It’s a simple but incredibly powerful way to protect yourself.
Beyond your IP, every single account you create needs to be secured with two-factor authentication (2FA). This means that even if someone manages to guess your password, they can’t get in without a second code, which is usually sent to your phone. It’s a simple flick of a switch in your security settings that can prevent a complete account takeover.
Think of your security like this: a good password is the lock on your front door. 2FA is the deadbolt, and a VPN is the high fence around your entire property. You need all three for real peace of mind.
Sanitising Your Physical Space
Your digital security can be perfect, but it counts for nothing if your physical background gives you away. Before every single stream, do a thorough sweep of what’s visible on camera. You need to look for anything that could dox you—that is, reveal your personal information.
This includes things like:
- Mail or Parcels: Address labels are an obvious no-go.
- Photos or Certificates: Anything with names, dates, or locations has to go.
- Distinctive Landmarks: A unique building visible out of your window can be enough for someone to pinpoint your location with Google Maps.
- Localised Items: A takeaway menu from a local restaurant or a carrier bag from a specific local shop can easily narrow down your area.
It might sound paranoid, but this needs to become a vital habit. A neutral background, a green screen, or even just a carefully curated and generic backdrop is always your safest bet.
Finally, let’s talk money. Your personal bank account should never be directly linked to your public streaming profile. Always use third-party payment processors like Paxum, Cosmo Payment, or others common in the industry. They act as a firewall, handling payments from the platform and then transferring the funds to you, ensuring your personal banking details remain completely private.
Getting Your Account and Payments Sorted
Alright, let's talk money. This is where we move from the creative side of streaming to the practical business of getting paid. It can feel like a bit of a bureaucratic maze at first—verifying your identity, linking payment systems, and figuring out the platform's rules—but getting this right from the outset is absolutely critical. Think of it as building a secure foundation for your new venture.
Before you can earn your first quid, every reputable platform needs to verify who you are. This isn't just red tape; it's a legal necessity to combat fraud, prevent money laundering, and, crucially, to confirm everyone using the site is of legal age. You'll need to be prepared to hand over some official documents.
Navigating the Verification Process
The verification gauntlet is pretty much the same wherever you go. The goal is simple: prove you are who you claim to be and that you meet the age requirements. It’s a non-negotiable step that protects both you and the platform.
To make things smoother, get these documents scanned and ready ahead of time:
- Government-Issued Photo ID: Your passport or driving licence is perfect for this. Make sure it's in date and the photo is crystal clear.
- Proof of Address: A recent utility bill or bank statement (usually from the last three months) works well. Your name and address must be clearly visible.
- The 'Holding ID' Selfie: This is the one that often catches people by surprise. You'll likely be asked to take a photo of yourself holding your ID next to your face, along with a piece of paper showing the platform's name and the current date. It feels a bit strange, but it's a highly effective way for them to confirm your identity in real-time.
This isn't just a box-ticking exercise. It's how the platform meets its legal obligations and establishes a baseline of safety for the community. If a platform has a weak or non-existent verification process, that's a massive red flag.
With your identity confirmed, it's time to set up your payment details. This is where that security mindset we talked about earlier really comes into play. You should never link your personal bank account directly. Instead, use a trusted third-party payment service that acts as a secure buffer. Providers like Paxum are popular in this industry for good reason—they keep your personal financial information completely separate from your streaming persona.
How the Money Actually Works
So, how do you turn viewers into revenue? Your income will likely come from a few different streams (pun intended), and each has its own rhythm. Understanding these is key to shaping your content and maximising your earnings.
- Tokens & Tips: This is the lifeblood for many streamers. Viewers purchase the platform's own currency (often called tokens) and "tip" you to show support or make a request. These micro-transactions happen live and often make up the bulk of your in-the-moment income.
- Private Sessions: This is where the real earning potential kicks in. A viewer pays a premium per-minute rate for an exclusive one-on-one video chat. While the platform still takes its percentage, your income from these sessions can be substantial.
- Subscriptions: Many platforms now have a "fan club" or subscription feature. For a recurring monthly fee, fans get access to exclusive content, the ability to private message you, or other perks you decide to offer. This creates a much more stable and predictable income stream.
Platform fees are an unavoidable part of the deal. Be prepared for the platform to take a significant cut, often anywhere from 30% to as high as 60% of your earnings. This fee covers their overheads—things like server bandwidth, payment processing, marketing, and customer support.
Always read the small print in the terms of service regarding payout schedules and fees. Some sites pay weekly, others monthly, and most have a minimum balance you need to reach before you can cash out. Do your homework, and you won’t face any nasty surprises later on.
Your Pre-Stream Sanity Checklist
That little red ‘Go Live’ button can feel a bit daunting, can’t it? You’ve put in all the effort to get your gear and software sorted, but what you do in those last few minutes can make or break your broadcast. Think of it as your pre-flight check – a simple routine that will save you from a world of stress.
The goal here is simple: catch any problems before your audience does. Nothing kills the vibe faster than the classic "Can you guys hear me?" routine or realising your camera is pointed at the cat. A quick, methodical run-through builds your confidence and lets you start the stream focused on your viewers, not on fixing a technical glitch.
The Five-Minute Pre-Show Routine
This isn't about tearing your setup apart and starting again. It's just a quick look-over to make sure everything is working as it should.
- Check Your Audio Levels: This one is absolutely essential. Do a quick local recording in OBS Studio or whatever software you use. Speak in your normal streaming voice. Is it clear? Is the level meter jumping into the red? You want to see it bouncing nicely in the green and yellow zones for a clean, professional sound.
- Check Your Visuals and Framing: Glance at your camera preview. How’s the lighting holding up? Are you framed in the shot the way you want to be? More importantly, scan your background for anything that shouldn’t be there – a stray piece of post, a reflection you missed, or that pile of laundry you meant to move.
- Check Your Connection: Run a quick internet speed test. The number you really care about is your upload speed. If it's looking sluggish, now is the time to restart your router, not when you’re live and the stream starts buffering. A solid connection is everything.
Pro Tip: The ultimate final check is to run a private test stream for just 60 seconds. It confirms that your software, your internet, and the platform are all playing nicely together before anyone else lays eyes on your broadcast.
Free Up Your System's Resources
Streaming asks a lot from your computer. Encoding video in real-time is a demanding job, so give your machine a fighting chance by shutting down everything you don't absolutely need.
Close down all those extra browser tabs (especially ones playing video), quit your email client, and pause any background syncs from services like Dropbox or Google Drive. Every little bit of CPU power and bandwidth you can reclaim will lead to a more stable, higher-quality stream.
On the flip side, make sure you have your moderation tools, chatbots, or any other stream-related apps open and ready to go. The last thing you want is to be frantically searching for the ban button when a troll appears. Following this checklist is a crucial part of any solid webcam streaming setup guide.
Right, let's get into the nitty-gritty. Now that we’ve walked through the core setup, you're probably buzzing with a few practical questions. Let's tackle some of the most common ones I hear from people just starting their streaming journey.
What's a Realistic Budget for a Good Starter Setup?
You can get a genuinely solid starter kit for between £150 and £250. This isn't about finding the absolute cheapest gear, but about making smart choices that deliver real quality right from the get-go.
Here’s what a sensible budget looks like:
- 1080p USB Webcam: A reliable model that gives you a crisp, professional image will run you about £60-£80.
- Separate USB Microphone: This is non-negotiable. Plan for around £50 to get a mic that sounds infinitely better than any built-in option.
- Basic Ring Light: A simple light can make a massive difference. Expect to pay £30-£50 for something that will seriously upgrade your video quality.
The golden rule here is to prioritise your audio and lighting. They have a much bigger immediate impact on your stream's perceived quality than an eye-wateringly expensive camera ever will.
What's the Biggest Mistake New Streamers Make?
Without a shadow of a doubt, it’s neglecting their audio. It's a classic rookie error. So many new creators sink their entire budget into a flashy camera, only to be let down by the tinny, awful microphone built into their laptop or webcam.
Your audience will forgive a slightly grainy video, but they will not put up with bad audio. A clear voice builds connection; distorted, echoey sound just makes people frustrated and sends them clicking away to another stream.
How Do I Figure Out My Upload Speed and Bitrate?
This gets a little technical, but it's absolutely vital for a stable, buffer-free stream. First off, head to a site like Speedtest.net and run a test. The key thing here is to ignore the big 'download' number and focus only on your upload speed.
A great rule of thumb in OBS is to set your streaming bitrate to about 75% of your stable upload speed. This gives you a crucial safety buffer for when your internet connection inevitably dips. For instance, if you have a steady 6 Mbps upload, setting your bitrate to 4500 Kbps (which is 4.5 Mbps) is a fantastic target for a high-quality 1080p stream at 30fps.