
If there’s one thing you should pour your budget into, it’s not the camera—it’s the lighting. I’ve seen countless streamers shell out for a top-of-the-line 4K camera, only to end up with a grainy, pixelated mess. On the flip side, a basic webcam can look absolutely brilliant when you get the lighting right. Your goal is to create a stream that’s clear, inviting, and looks polished enough to make people stick around.
Why Your Webcam Lighting Is Everything
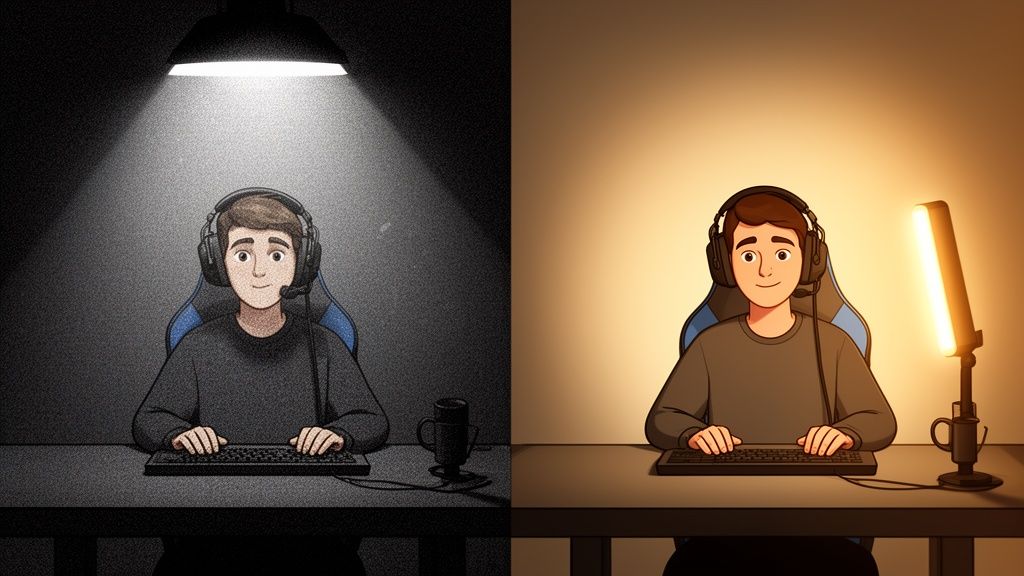
Let's cut to the chase. When you're live streaming, your video quality is your first impression, and viewers decide in seconds whether to stick around or click away. A shadowy, pixelated image instantly tells them you're an amateur. Many people assume a better camera is the answer, but they’re left frustrated when their expensive new gear still makes them look like they're broadcasting from a potato.
The real problem is almost always a lack of light. Your camera's sensor is trying its best, but in a dim room, it has to crank up its digital sensitivity (gain). This digital boost is what creates that horrible, noisy grain. Good lighting gives the sensor exactly what it needs to capture a sharp, clean picture, which immediately builds trust and makes you look credible.
Light Is Your Best Investment
Stop thinking of lighting as just another piece of kit. It’s a powerful business tool. In a sea of endless streaming options, a professional look makes your channel a place where people want to hang out—and spend tokens. It’s about crafting an experience, not just hitting ‘go live’.
This is particularly true in the fiercely competitive UK market. With the live video streaming segment accounting for a massive 76.28% revenue share, every creator is looking for an advantage. In fact, many UK streamers I've spoken to report that simply upgrading their lighting setup led to a 20-30% jump in tips and tokens, purely because it signals a higher level of commitment. You can dig into more UK streaming market data from Grand View Research if you're curious.
Good lighting is the difference between looking like a professional creator and looking like you’re making a hostage video in your parents' basement. It’s the single fastest way to level up your entire brand.
At the end of the day, great lighting for live streaming makes sure your visual quality reflects the hard work you put into your content. It makes you appear more engaging, helps your audience connect with you, and gives them a reason to keep coming back. And really, isn't that what it's all about?
Getting to Grips with Flattering Light
Forget those super-technical manuals or YouTube tutorials that sound more like engineering lectures. Getting your lighting right isn't about complex physics. It's about understanding three core ideas that make the difference between a pro-looking stream and a grainy, amateurish mess. Once you get these down, you can make almost any light work for you.
Think of bad lighting as that single, harsh overhead bulb you see in police interrogation rooms on TV. It casts deep, unflattering shadows, highlights every imperfection, and generally makes you look tired and stressed. Good lighting, on the other hand, is like the warm, even glow of a sunset—it’s soft, forgiving, and makes everything look better. Your mission is to get out of the interrogation room and into that golden hour.
The Big Three of Lighting
To pull off that flattering look, you really only need to master three key elements. If you can learn to control these, you can control the entire vibe and quality of your stream.
- Softness (or Quality): This is the big one. Soft light comes from a large source that’s been spread out, or diffused. It wraps around you gently, smoothing out harsh shadows. In contrast, hard light comes from a small, direct source (like a bare bulb), creating sharp, distracting shadows. This is why a softbox is a streamer's best friend—it turns a small, hard light into a big, soft one.
- Temperature (or Colour): This is all about the mood. Measured on the Kelvin (K) scale, it’s the difference between a warm, cosy, candlelit feeling (around 3200K) and a cool, clinical, daylight look (around 5600K). Neither is right or wrong, but consistency is crucial. If you mix different colour temperatures, your camera’s white balance will have a meltdown trying to figure things out.
- Brightness (or Intensity): This is simply how much light you're throwing at the scene. Too little, and your camera sensor will struggle, creating a noisy, grainy image. Too much, and you'll look completely washed out and overexposed, like a ghost haunting your webcam.
The UK's streaming scene is absolutely booming, with video entertainment revenues recently hitting a massive £5.44 billion. With that kind of growth, the competition is getting serious. Poor lighting, which often leads to weird colour shifts and a cheap look, is one of the fastest ways to have viewers click away to a more polished creator. You can read more about it in the latest ERA data breakdown on CSI Magazine.
Here's the fundamental trade-off: harsh, direct light is easy and cheap, but it looks terrible. Soft, diffused light takes a bit more effort (or a better tool, like a softbox or ring light), but it delivers a professional and flattering image every single time.
Ultimately, choosing your lighting all comes down to controlling these three elements. You don't need a Hollywood budget to get it right. You just need to understand what makes light work for you instead of against you. Honestly, a cheap LED panel with some baking paper taped over it to diffuse the light can look better than an expensive light pointed straight at your face. It's all in how you use it.
How to Master Three-Point Lighting
If you want to look like you’ve got a production crew hiding just off-camera, you need to get your head around three-point lighting. It’s the industry standard for a very good reason, but don't worry—it’s not nearly as complicated as it sounds.
Think of it as a flexible recipe for making you look dimensional and professional, not a rigid set of rules you have to follow perfectly.
This classic setup uses three distinct light sources, each with a specific job. Together, they sculpt your face, eliminate unflattering shadows, and make you pop right off the background, which is crucial for holding a viewer's attention.
The diagram below breaks down the core principles we're about to put into practice.
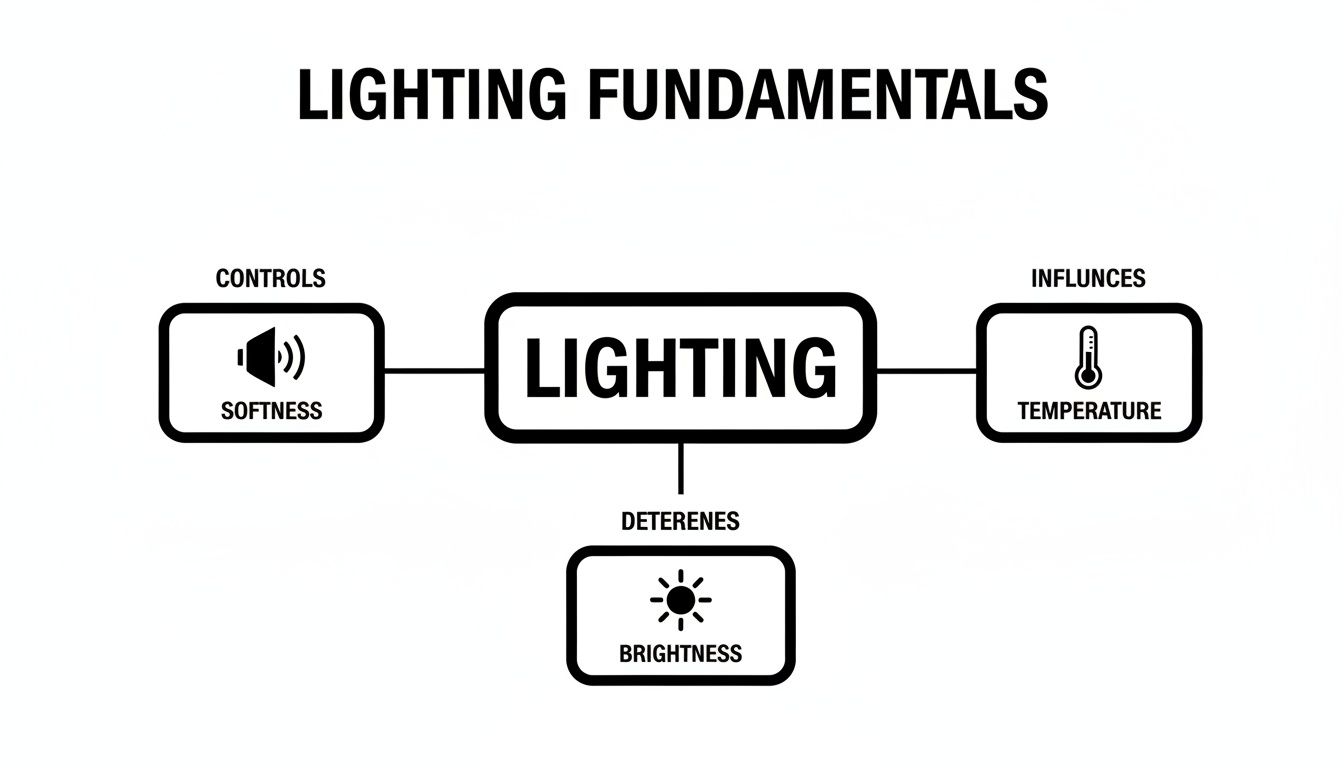
This gives you a quick visual on how softness, temperature, and brightness are the fundamental controls you'll use to shape the perfect lighting environment for your stream.
Meet Your Lighting Team
The real magic of three-point lighting comes from how each light works together. It’s a team effort. Let’s get to know the players and their roles on the field.
The Key Light
This is your main light, your MVP. It's the brightest source in your setup and does most of the heavy lifting. You’ll typically place it about 45 degrees to one side of your camera, positioned slightly above your eye level and angled down towards you.
This placement is intentional—it creates a natural, defining shadow on the opposite side of your face, which is exactly what gives it shape and dimension.
The Fill Light
Think of this as your shadow-softener. Placed on the opposite side of your key light, its job is to gently fill in the deep shadows created by the key. It should be much less intense—setting it to about half the brightness of your key light is a great starting point.
This ensures you still have some shaping shadows, but you don't look like you’re half-hiding in the dark.
The Back Light (or Hair Light)
This is your secret weapon for looking professional. Positioned behind you and often slightly above your head, this light shines on your hair and shoulders. Its sole purpose is to create a subtle glowing outline that physically separates you from your background.
It's a small detail that adds a massive amount of depth and polish to your shot.
Here's a quick reference guide to keep the roles straight.
Three-Point Lighting Role Breakdown
| Light Type | Purpose | Typical Placement | Budget Alternative |
|---|---|---|---|
| Key Light | The main, brightest light source that defines the shape of your face. | 45° off-centre from the camera, angled down from above eye level. | A bright desk lamp or a window with natural light. |
| Fill Light | A softer, dimmer light that fills in harsh shadows created by the key light. | On the opposite side of the key light, generally at half the intensity. | A white foam board or reflector to bounce light back. |
| Back Light | Creates separation from the background by adding a subtle rim of light. | Behind you, often aimed at the back of your head and shoulders. | A small, cheap LED lamp placed out of frame behind you. |
Remember, the goal isn't just to blast yourself with light from all angles. It's about using light and shadow strategically to create a flattering, three-dimensional image.
You don't actually need three separate, expensive lights to pull this off. The principle is what matters. Your "fill light" could just be a cheap white reflector bouncing light back from your key light, or even a small desk lamp with a sheer sock over it for diffusion.
Start by setting up your key light first. Then, add the fill to soften things up. Finally, turn on the back light to see yourself lift away from the background. From there, it's all about tweaking the positions and brightness until it feels right to you.
Choosing Your Gear on Any Budget
You absolutely don't need to break the bank to get professional-looking lighting for live streaming. It’s all about spending smart, not just spending big. Whether you’re scraping together your first setup or you’re ready for a serious upgrade, there's a solid option out there for you.
Let’s walk through what makes sense at each stage, focusing on getting the best bang for your buck.
The Scrappy Starter Setup
When you're just getting your feet wet, the best light source you have is probably free: the sun. If you can, set up your desk so you're facing a window. This will give you a gorgeous, soft, and natural light that cameras love. The only catch is that you’re at the mercy of the sun – the light’s colour and brightness will change throughout the day, which can throw your camera’s white balance for a loop.
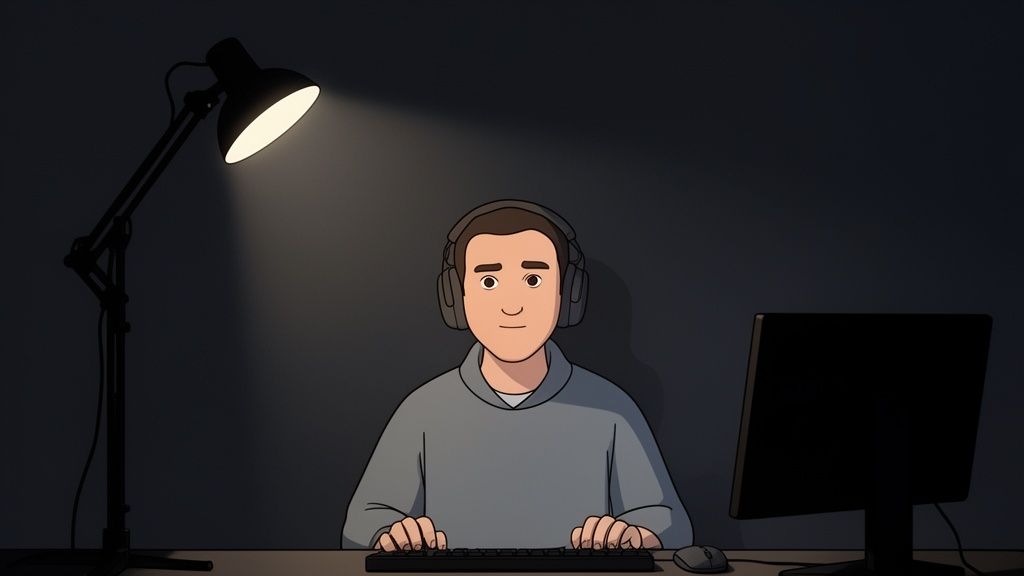
For evening streams, get creative with what you already own. A simple household lamp can work wonders. Try placing a tall lamp just off to the side of your monitor, maybe at a 45-degree angle, and then drape a thin white t-shirt or even some baking paper over it. This little DIY trick acts as a diffuser, softening the harsh bulb and creating a surprisingly flattering key light for literally zero cost.
The Serious Creator Setup
Okay, so you're ready to invest a little? This is where the majority of streamers find their sweet spot. Your main choices here will be a ring light or dedicated LED panels.
A ring light has become the go-to for a good reason. It bathes your face in even, direct light, which is fantastic for eliminating shadows and creating that tell-tale circular catchlight in your eyes. They're incredibly simple to use and are perfect if your stream is mostly a head-and-shoulders shot. The only real downside is that the light can sometimes feel a bit "flat," as it's hitting you from every angle at once.
LED panels give you a lot more creative freedom. You can start with one as a key light and later add a second one, dimmed down, as a fill light. This gives you much more control to shape your face with subtle shadows, adding depth to your look. Many of these panels come with adjustable brightness and colour temperature, which is a game-changer for dialling in the perfect vibe.
The Pro-Level Ambitious Setup
When you're committed to achieving that truly polished, top-tier look, it's time to talk about softboxes. A dedicated softbox kit, from brands like Elgato or Newell, is the gold standard for a reason.
A softbox takes a powerful, harsh light source and pushes it through a large sheet of diffusing fabric. What comes out the other side is an incredibly soft, flattering light that wraps around you. It mimics that beautiful quality of natural window light, but with the massive advantage of being completely controllable and consistent.
This is the secret behind that clean, almost cinematic quality you see on the biggest streams. You get all the power you need without any of the harsh shadows or the need to squint into a bare bulb. It's also fantastic for lighting a larger area, which is essential if you tend to move around a bit or use a green screen.
Investing at this level also brings some serious quality-of-life improvements. Many professional lights can be controlled remotely. For example, you could use a Stream Deck alternative to switch between different lighting scenes with a single button press. Imagine swapping from a bright, high-energy setup to a moody, intimate one without ever leaving your chair. It's a small thing that makes a huge difference.
Lighting Options by Budget
To make sense of it all, here's a quick comparison of the gear we've discussed.
| Budget Level | Gear Example | Pros | Cons | Estimated Cost (UK) |
|---|---|---|---|---|
| Scrappy Starter | Window & Desk Lamp | Absolutely free to start; uses what you already have. | Inconsistent (daylight); lacks control and intensity. | £0 |
| Serious Creator | Ring Light or LED Panel | Consistent, flattering light; affordable and easy to set up. | Can look flat; less flexible than a full kit. | £40 – £150 |
| Pro-Level Ambitious | Elgato Key Light / Softbox | Professional, soft, controllable light; excellent for quality. | Higher initial cost; takes up more space. | £150+ |
Ultimately, the right choice depends on where you are in your streaming journey and what you're trying to achieve. Don't feel pressured to jump straight to the pro-level gear; a simple ring light can serve you incredibly well for a long time.
Getting Your Camera to Cooperate
Even the most incredible lighting setup will fall flat if your camera is working against you. Your lights and your camera need to be on the same team. If they aren't communicating, you’ll end up with a blurry, grainy image where the colours are all wrong. To get that sharp, professional look, you have to take your webcam off autopilot and tell it exactly what you want.
Leaving your camera on ‘auto’ is a recipe for disaster. It’s constantly guessing what the exposure and colour should be, which is why your video brightness can suddenly flicker or the colour tone shifts every time you move an arm. Taking manual control lets you lock in a consistent, high-quality look that will immediately set you apart.
Understanding White Balance
If there's one setting you absolutely must master, it's white balance. This is how you tell your camera what "white" actually looks like under your specific lights. If you get this wrong, your skin will look unnaturally orange, ghostly blue, or even a bit green around the gills.
The aim here is to look neutral and natural. That warm key light you set up is meant to feel inviting, but a camera on auto-white balance will try to "fix" it by adding blue tones, which just makes you look washed out. On the flip side, if you're using a cooler daylight bulb, the camera might overcompensate with orange, turning you into a tangerine.
Locking in your white balance is non-negotiable. It guarantees your skin tones stay consistent and true-to-life for your entire stream, which is a massive part of looking professional.
Taking Back Control
Switching off auto mode is much easier than it sounds. Most popular webcams, like the ones from Logitech or Razer, come with their own software that gives you access to all the manual controls you need. Even if yours doesn't, a free tool like OBS Studio can often unlock those hidden settings.
Here’s a simple breakdown of what to do:
- Turn Off All 'Auto' Settings: Jump into your camera's control panel and look for settings like White Balance, Exposure, Focus, and Gain. Find every single "Auto" checkbox and untick it. You're in charge now.
- Set Your White Balance: You'll usually find a slider measured in Kelvin (K). Just slide it left and right while looking at your video preview. You want any white objects in your shot (like a sheet of paper) to look pure white and your skin tone to look completely natural.
- Adjust Exposure and Gain: Exposure is how long the camera's sensor collects light. Gain is basically a digital brightness boost. You should always lower the gain as far as you can to get rid of that ugly, grainy noise, and then bring up the exposure until your image is perfectly lit.
These little tweaks make a world of difference. For a closer look at which cameras give you the best manual options, be sure to check out our guide on choosing the best camera for live streaming. Getting your lighting and camera settings in sync is the final piece of the puzzle for a truly flawless stream.
Using Light to Protect Your Privacy
Smart lighting for live streaming goes way beyond just making you look good. Think of it as a crucial part of your operational security. Most guides will tell you how to flatter your face, but you can also wield light and shadow to control what your viewers can't see, protecting your anonymity and personal space.
This is about seeing your lights not just as cosmetic tools, but as fundamental security assets. Your mission is to create a controlled bubble, making absolutely sure you only show what you intend to show.
Creating Strategic Shadows
Believe it or not, your most powerful privacy tool is shadow. While your key light puts you in the spotlight, the unlit corners of your room are your first line of defence against accidental reveals. You want to be the brightest, most captivating thing in the frame, letting everything else recede into controlled darkness.
Use this principle deliberately. Got a unique poster on the wall? A distinctive piece of furniture? A window with a view someone might recognise? Arrange your lighting to keep those areas completely unlit. By focusing your key and fill lights tightly on your performance space, the background becomes a neutral, anonymous void. It's a surprisingly simple yet effective way to obscure details that could be used to pinpoint your location. For more on platform safety, our guide on how webcam sites work dives deeper into the mechanics.
Hunting for Unwanted Reflections
Reflections are the sneakiest threat to your privacy. A fleeting glint in a pair of glasses or a flicker across a monitor screen can give away far more than you'd ever want. Before you even think about going live, you need to do a thorough reflection check.
Your webcam sees everything. A reflection of your monitor could flash your real name from an email notification, reveal personal desktop shortcuts, or even show your face if you’re using another camera. Treat every single shiny surface as a potential security leak.
Here’s a quick checklist to run through before every stream:
- Eyeglasses: Position your lights higher up and angle them down. This will bounce reflections away from the camera lens instead of directly into it.
- Monitors: Any screens not essential for your stream should be turned off or covered. An anti-glare screen protector can be a lifesaver here.
- Shiny Surfaces: Scan your setup for reflections in jewellery, picture frames, glossy desk finishes, or even your phone screen. If it shines, remove it or cover it up.
- Your Eyes: The tell-tale circle from a ring light can be distracting in your eyes. If it bothers you, swapping it for two separate soft lights will create a more natural look.
Got Questions About Your Stream Lighting?
Even with a solid plan, getting your lighting just right often comes down to troubleshooting a few common hiccups. Let's tackle some of the questions I hear most often from streamers trying to nail their look.
Is a Ring Light Really Good Enough to Start?
You bet. For many streamers, a ring light is more than just a starting point; it's the perfect solution. It wraps your face in soft, flattering light that smooths out shadows, making it a fantastic, all-in-one option, especially if your stream is mostly a head-and-shoulders shot.
While a full three-point setup gives you more creative control, you really can't beat a ring light for its plug-and-play simplicity.
How Can I Stop That Annoying Glare in My Glasses?
Ah, the classic glasses glare. The trick here is all about angles. Try raising your main light source (your key light) so it’s higher than your head and angled down towards your face.
This simple adjustment changes the angle of reflection, causing the light to bounce down and away from your camera's lens instead of straight into it. You might need to fiddle with the position a bit, but you'll find that sweet spot where the glare vanishes.
My Background Is Either a Black Hole or Blown Out—Help!
This is a classic balancing act. If your background is a dark void, you need to create some separation. A small, simple lamp placed out of sight behind you and pointed at the wall can work wonders. This creates a subtle glow that helps you stand out from the background.
On the flip side, if your background is way too bright—like a sunny window—the solution is to overpower it. You need more light on yourself. Crank up your key light's brightness until your face is the brightest, most important part of the shot.
What’s the Best Colour Temperature to Use?
For a crisp, natural look that mimics daylight, I'd aim for something in the 5000K–5600K range. If you're after a warmer, more intimate vibe for your stream, dropping down to around 3200K will give you that cosy, evening feel.
The golden rule here is consistency. Whatever you choose, make sure all your main lights are set to the same colour temperature. Mixing them will throw your camera's white balance into a spin, resulting in some strange and unflattering colours on your skin. Stick with one, and you'll be golden.